Hi all,
Now that SerpentOS has a "usable" ISO available, I have created a guide on how to install it in a VM. With some knowledge and adaption you should also be able to install SerpentOS on bare metal although it is 100% not ready for production use. This guide is for virt-manager but users have been able to install in VirtualBox, Boxes & QEMU. I'm not sure on any other virtualisation software but I don't see any reason why with the same principles, you wouldn't be able to get it working.
Serpent OS Status: pre-alpha0 (technical preview)
@ermo asked me to put this here:
DISCLAIMER
Serpent OS is currently in heavy development. It is not feature complete, may contain known and unknown bugs and is supplied "as-is".
If it breaks your computer or your existing operating system install, you get to keep both pieces.
No warranty (express or implied) is offered, and we offer no guarantee of support for Serpent OS in its current state.
Serpent OS is currently targeted at developers who don't flinch at being very early adopters of emerging, pre-alpha technology, who are experienced enough with Linux to be able to help themselves, and who might enjoy contributing to Serpent OS.
We also do not take package requests at this early stage, as we're mainly in discovery mode for deciding where to put our development focus next.
Prep
Download the latest iso from click here. It's easiest to sort by most recent date.
Note on installs to bare iron
The only "supported" bare iron install method is to give Serpent OS a dedicated disk with its own:
- EFI System Partition (ESP, >= 256 MiB) formatted as FAT32 (or FAT16 is your UEFI is old and weird)
- Extended Boot Partition (XBOOTLDR, 4 GiB) also formatted as FAT32 for now as well
- System root partition (>20 GiB), formatted as XFS (gives a better experience with moss than f2fs and ext4 both)
Every other combination of filesystems is unsupported.
For bare iron installs, you can follow the guide below from the header In Serpent Live Environment.
Install Serpent OS live ISO to a virt-manager VM
Prepare virt-manager

Open virt-manager, go to Edit, Preferences

New VM and for x86 Firmware select UEFI and then close.
Create Virtual Machine

Then select file, new virtual machine.

Go forward with Local install media

Browse and select the iso you've just downloaded and unselect "Automatically detect from the installation media / source

For the choice of operating system you are installing, I selected "Generic Linux 2020"

Select the amount of Memory and CPU cores you want to allocate to your Serpent VM. Don't select values too high as you need your main PC to still function. 4gb and 2 cores will be fine but the more you can allocate, the better the system will perform.

Similarly for storage, I selected 40gb to allow some space after the install for additional packages and files. This will depend on how much spare storage you have available in your system and how much you're willing to commit to this VM.

Name your VM and select Finish. It should boot up into the live gnome environment for SerpentOS.
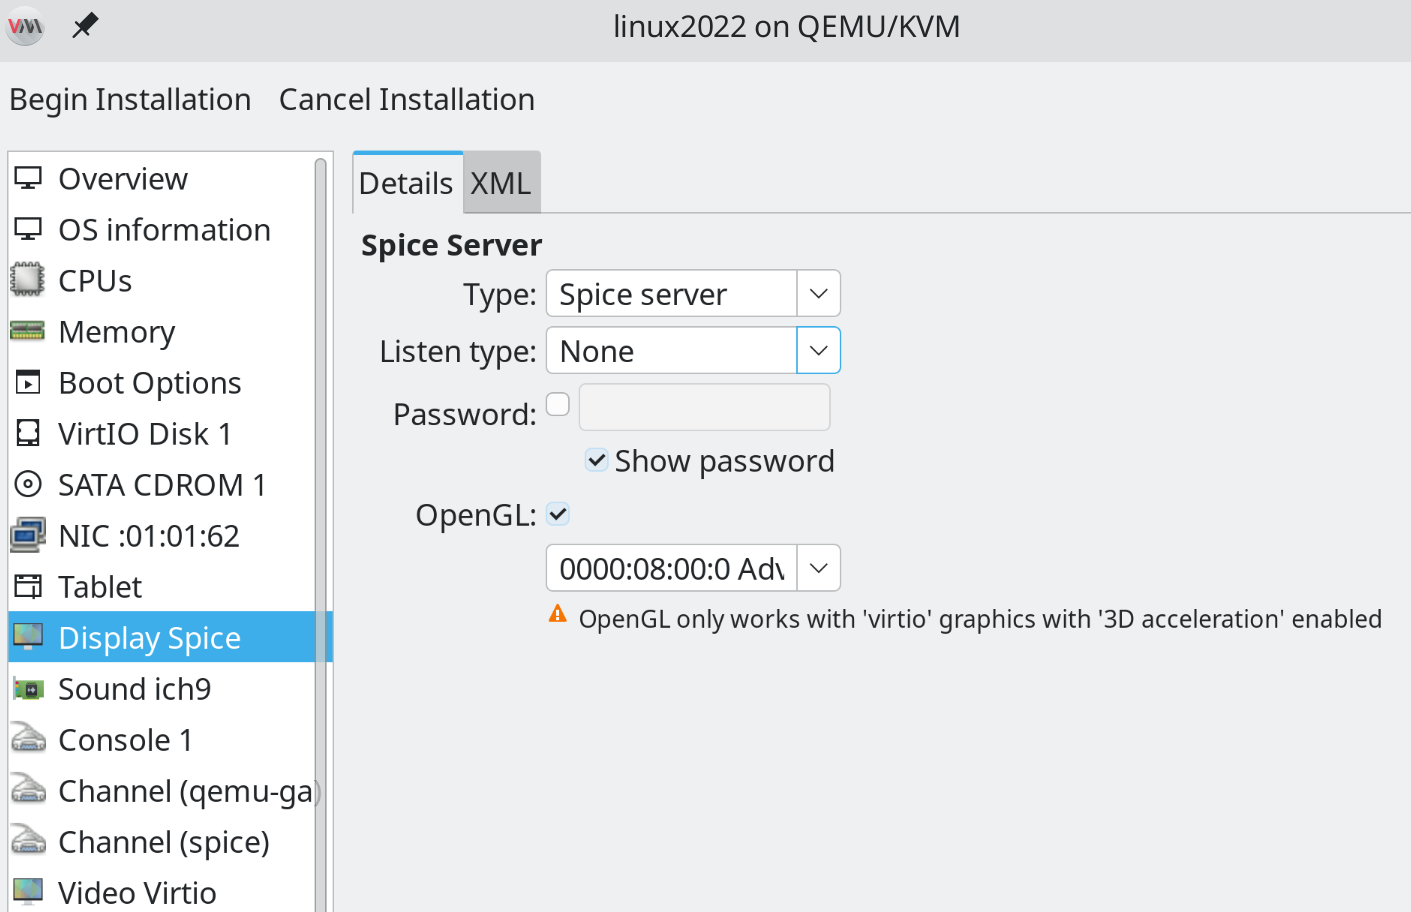
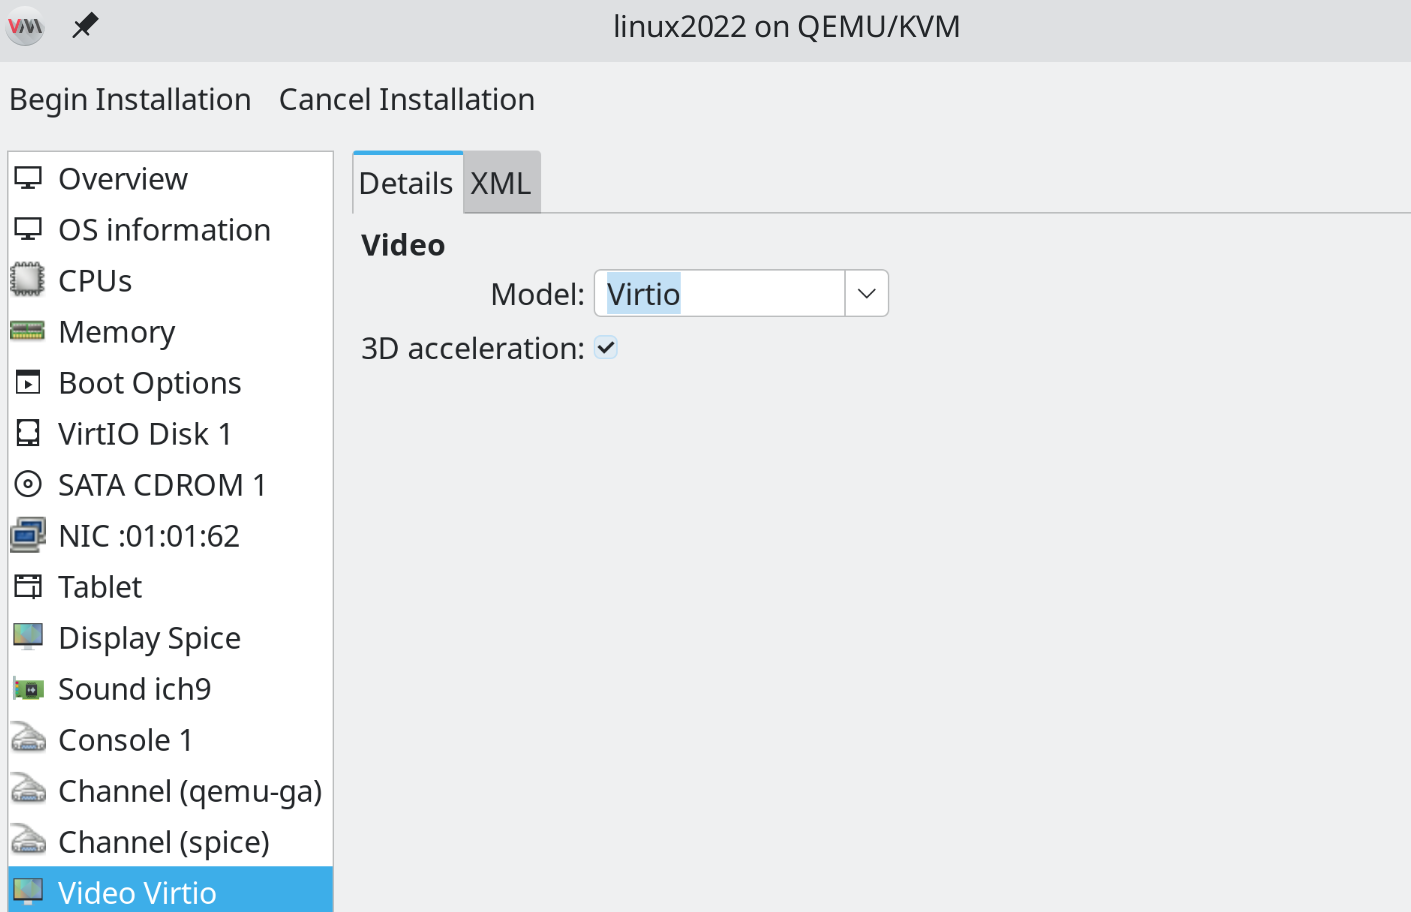
Notes on required 3D acceleration
The Cosmic and GNOME editions both expect a working 3D accelerated OpenGL setup.
This is how you configure virt-manager to support 3D accelerated OpenGL. Note: This will likely only work on open source drivers provided by the Mesa 3D library.


In Serpent Live Environment
Open console:
sudo fdisk -l #My example would have "/dev/vda" as a 40gb drive
sudo fdisk /dev/vda
Inside fdisk:
g                 # Create a new GPT partition table
n                 # Add a new partition
1                 # Partition number 1
<Enter>           # Default - start at the beginning of the disk
+256M             # 256 MiB size
t                 # Change partition type
1                 # EFI System partition (ESP)
n                 # Add a new partition
2                 # Partition number 2
<Enter>           # Default - start at the beginning of the available space
+4G               # 4 GiB Size
t                 # Change partition type
2                 # Partition number 2
142               # Linux extended boot partition (XBOOTLDR)
n                 # Add a new partition
3                 # Partition number 3
<Enter>           # Default - start at the beginning of the available space
<Enter>           # Default - end at the end of the disk
w                 # write the changes
sudo mkfs.fat -F32 /dev/vda1
sudo mkfs.fat -F32 /dev/vda2
sudo mkfs.xfs /dev/vda3

sudo fdisk -l /dev/vda        # This will help you confirm that the changes have been made
You should now see
dev/vda1 (256M EFI System)
dev/vda2 (4G Linux extended boot)
dev/vda3 (35G Linux filesystem)
Now you are ready to install SerpentOS
Note: If you are NOT using a US English PC104 keyboard layout, it is important that you set your keyboard layout up in GNOME Settings before opening up the new terminal in which you will be starting the lichen text installer below.
If you do not do this, you will be typing in your passwords with an US English PC104 keyboard layout in the below the instructions.
sudo lichen
- You will be given the initial option to select your ESP + XBOOTLDR partitions. You should only have the one combination that you just created, so you can select Enter
- Same thing for installing your main disk. you should only have the 35GB Linux File system so just hit Enter
- Select your preferred Desktop Environment (GNOME is the default)
- Select your language of choice
- Select your timezone # You can type your city and it should come up
- Enter your new root password twice
- Enter your preferred username
- Enter your preferred user password twice
You will be asked to check and confirm everything is correct and if it is, just type "Y" and it will start installing.
Once it's done, type reboot and the system should reboot into the main Serpent Gnome environment
Useful stuff to do when booting up Serpent OS for the first time
Once you're in Serpent, there's a few things to do:
Add the flathub flatpak repository
To keep the Serpent OS software repository manageable while we refine our tooling and workflows, we have decided that the best approach for us is to rely mainly on flatpak software for user-facing GUI applications for the time being.
Open up console and set up flathub:
flatpak remote-add --if-not-exists flathub https://dl.flathub.org/repo/flathub.flatpakrepo
Then relog (log out and log back into your session).
(optional) Install COSMIC Desktop
If you want to install the COSMIC Desktop Environment:
sudo moss install cosmic-desktop
then reboot your system.
From here on out, you can use moss or flathub (via the Gnome Softare application or the CLI) to install whatever you want.